
Twitter no doubt is one of the most popular Social Media platforms people use to learn about what is happening around the world. We don’t only get information but also get to be part of the conversation itself.
These conversations can be segregated into categories. So that you only get to see what motivates you, inspires you, or simply things that inspire you.
Hashtags are one popular way to search for news & happenings that interest you. Another way is to look for what is trending globally or locally in your area. For me, it is thrilling to be able to see what millions of people think about a given idea or topic.
If you were speaking to someone directly, they wouldn’t be so open and would hesitate to say what they have in their minds. When they are online, they are not speaking to you directly. Most of the time, they would be replying or communicating with thoughts with people they do not know. And that is why I believe they are more open. And you can read their thoughts.
Also Read: 10 Tips To Make Your WordPress Site More Interactive
Why Display Tweets On Your Website?
There could be many reasons why would want to display Twitter feeds on your website.
One reason could be to encourage engagement and promote your Twitter handles to your audience. When you decide to display your latest Tweets on your website, your visitors can engage with your Tweets and follow the link to Twitter.
If the user finds the tweets interesting, there is a probability that the user would follow your account. Thus, promoting your Twitter handle. The more followers you get overtime, the more people that your ideas get shared with.
Another reason would be to display tweets based on Hashtags or Search terms, that you feel would interest your users. For example, if you are running a travel site, you could display tweets from the destinations that you promote. Those tweets would be targeted and would interest your website visitors, leading them to stay on your site for longer.
The content you receive is free. You don’t have to pay a dime for it. You also don’t have to spend your time creating those content too. We are talking about tweets that are publicly available, and therefore, you can display them on your site for free.
Also Read: Top WordPress Blogs to Follow in 2020
How Do You Display Twitter Feeds on Your WordPress Site?
The best way to do this is to use a plugin that can automate everything for us. That way, we don’t have to bother with the technical aspects and don’t have to know any coding at all. The plugin can take care of all the complexities and fetch and display tweets for us.
For this purpose, we will use the plugin, Ray Social Feeds For Twitter. It is a free Twitter Feeds plugin that is available for download through the WordPress Plugin Repository.
Let me give you a little background on how this works. It uses Twitter’s API to fetch tweets in real-time. To use the API one usually needs to generate Consumer Key, Consumer Secret, Access Token, and Access Token Secret.
Many plugins require you to register with Twitter as a developer and get those above credentials to use their app or plugin.
However, with Ray Social Feeds For Twitter, you simply generate the API credentials needed to fetch tweets within a couple of clicks. We will see how that is done in the next steps.
We will go through each of the steps one by one and display the tweets in this post itself. We will see how easy it is to use this plugin.
Step 1: Install the Plugin
Login to your WordPress Dashboard. Go to Plugins > Add New
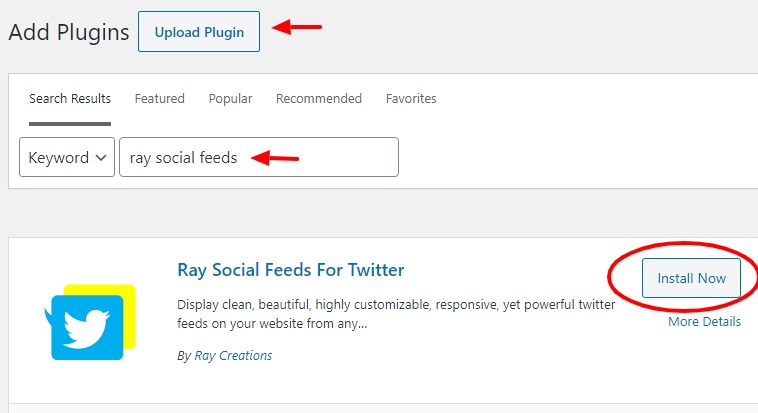
You can use the “Upload Plugin” option if you have a zip file of the plugin.
In our case, we will simply type “ray social feeds” in the search box and you see the plugin, Ray Social Feeds For Twitter, in the results list.
Click on “Install Now”.
Once installed, activate the plugin by clicking on “Activate”. This is, of course, the standard way of installing all plugins.
Step 2: Generating Access Tokens
In this step we will generate the access tokens that the plugin will use to communicate with the Twitter API and fetch our tweets for us.
We can access our plugin by going to the Dashboard > Settings > Ray Twitter Feeds
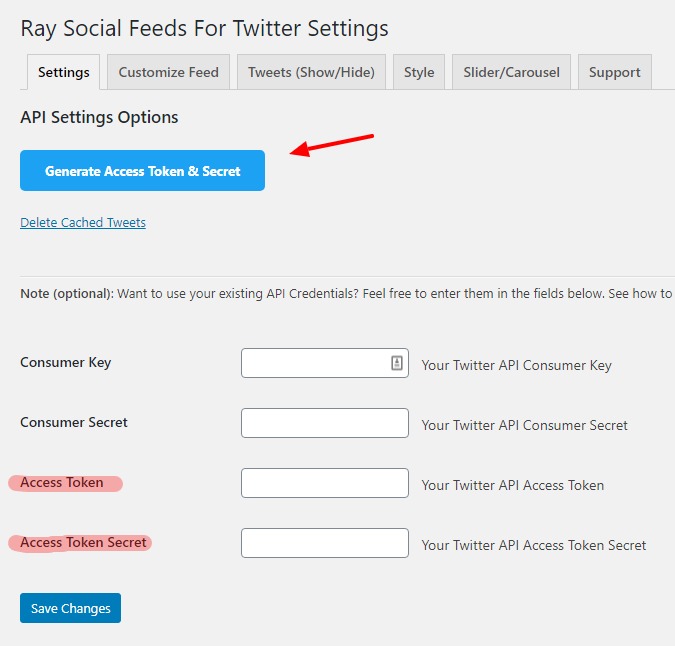
As you can see the Consumer key, Consumer secret, Access token, Access token secret are all empty.
If you have a Twitter app of your own and have those keys, you can use them here with the plugin. Most people won’t have those credentials. So, we will let the plugin create the necessary token & secret for us.
We will click on the blue button that says, “Generate Access Token & Secret”.
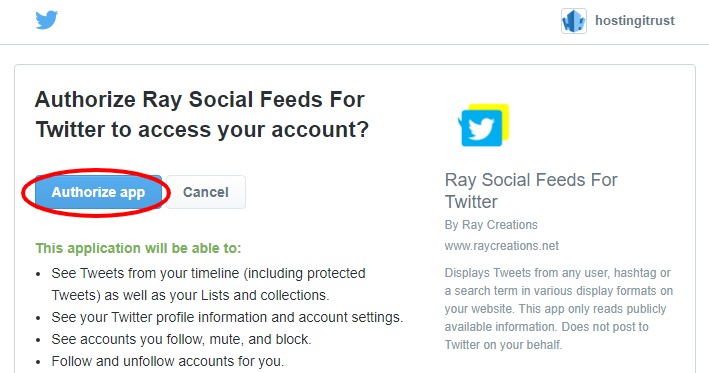
Once you click that button, you will be redirected to Twitter with a similar screen like the above. Here, the plugin is requesting access to your Twitter account.
If you are not logged in, it will give you the option to log into your Twitter account.
Next, you need to click on the “Authorize app” button to allow the plugin to fetch your access token & secret. These will be used to fetch tweets for you.
Once you authorize the app/plugin, you will be redirected back to the plugin page and you will find the tokens prefilled in & saved for you. As shown in the screenshot below.
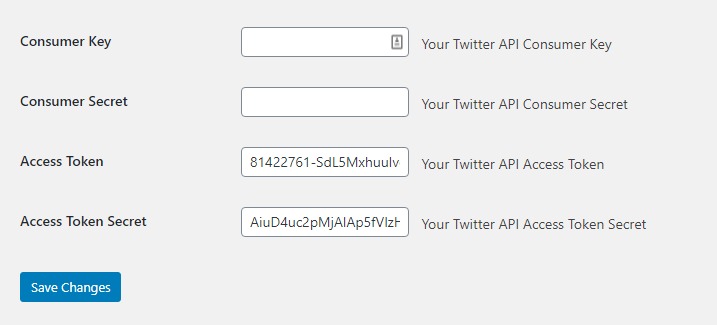
That’s it. The installation and configuration of the plugin are now complete. Now we can proceed to the step of displaying the actual tweets on the website.
And we will do exactly that. We will use the shortcodes in the subsequent sections to display tweets on this very page.
Step 3: Displaying Tweets
If we want to set default values for our shortcodes, then we could go to the “Customize Feed” tab of this plugin. And whatever options we choose here would be used as default, if we do not mention those values explicitly in shortcodes.
However, for our example in this article, we will simply use good old fashioned shortcodes.
In the “Support” tab of the plugin settings page, you will find an exhaustive list of all the options you can use in your shortcodes. And we will use this page as a reference in constructing our shortcodes.
In this free version, we can display two feed types: User Timeline & Mentions
User timeline is where you fetch tweets for any Twitter user.
Mentions timeline is where the authenticating user’s Twitter mentions are displayed. Also, you can choose between two display styles: List & Slider 1 Column
So the shortcode is:
[my_custom_tweets]But let’s say:
- We want to display five tweets
- The Feed Type should be User timeline
- We will display the tweets from our own Twitter handle, @hostingitrust
- The Display Style should use the List format
- We want to ensure that all external links are nofollowed
- We want to display tweet border
- And tweet border should be in the form of a shadow
- We want to include retweets
So, the final shortcode would look like this:
[my_custom_tweets count="5" feed_type="user_timeline" screen_name="hostingitrust" display_style="display_list" nofollow_ext_links="1" display_tweet_border="1" border_type="shadow" include_rts="1"]And when I place this shortcode here, I get this:
[my_custom_tweets count=”5″ feed_type=”user_timeline” screen_name=”hostingitrust” display_style=”display_list” nofollow_ext_links=”1″ display_tweet_border=”1″ border_type=”shadow” include_rts=”1″]
Remember I could have set the many defaults in the settings page, like whether to display border, border type, feed type, screen name whose tweets are to be shown. The default number of tweets to fetch, whether to include retweets or not, etc.
Therefore, in a way, we could have set all options that we used individually in the shortcode as default. So that we would have ended up with a simple shortcode as this:
[my_custom_tweets]It would have displayed the same feed as above. So, there we go, we have displayed tweets on our website using some simple easy steps.
Twitter Feed Widget
With this plugin, Ray Social Feeds For Twitter, we also have access to Twitter widgets. We login to the Dashboard and go to Appearance > Widgets
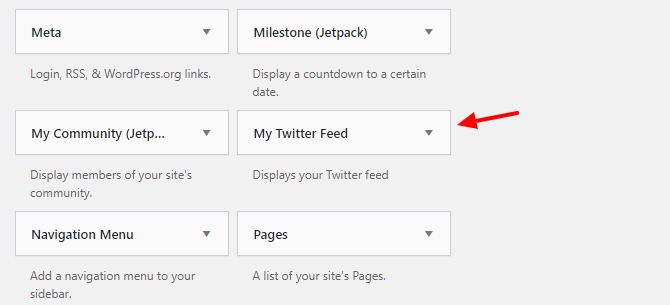
You can see the widget named, My Twitter Feed. You can drag this widget to any widgetized area, like sidebar, footer, etc.
You can simply click on the little arrow next to the widget name, which pulls up this menu shown below.
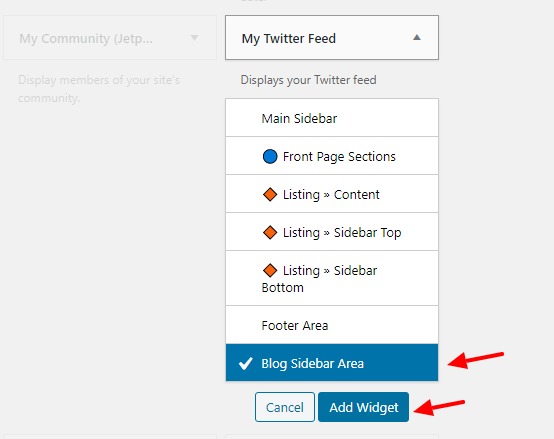
It displays all widgetized areas where this widget can be displayed. Here we are choosing the Blog Sidebar Area.
Next, we click on Add Widget which adds our widget to the Blog’s sidebar. We expand the widget and select the options that we want for this widget. We have chosen here to display a user timeline for the screen name @hostingitrust. Which is obviously our twitter handle.
However, we have chosen to display a 1 column slider as the display style. Whatever option we choose for that slider will be specific to that slider only.
All widgets can have their own individual settings.
You can see how that slider looks in the blog sidebar.
Learn more about the free version here.
Also Read: 5 Essential WordPress Maintenance Tasks To Keep Your Site Safe & Healthy
Ray Social Feeds For Twitter – Pro
The pro version comes with many more features. You get to display tweets in Masonry and 2 column sliders. Each tweet can display vivid images & videos that make the tweets a lot more vibrant.
In fact, the feed looks so much better than the monotonous feed on the actual Twitter platform itself.
Learn more about the Pro version here
You can see the pro demo here
I hope you learnt how to add Twitter feeds to your WordPress site easily.
Let us know what you thought about this review in the comments below.